Wednesday, November 17, 2010

DIY Maternity Pants

When my sister announced plans for her snowy outdoor mountain wedding, I went into overdrive going through closets and boxes trying to see if anything Alex had was suitable for hanging outside in the cold for hours. I thought I had hit paydirt when I stumbled upon a new pair of corduroys and a pair of homemade babylegs from before we moved to south Texas. I was still basking in my victory when I realized that my husband and I hadn't figured out what we were wearing.
Cute husband was leaning towards his suit, until I reminded him that 20 degree weather and a bonfire probably wouldn't be suit friendly. Unfortunately Alex heard him say the "S" word. Suits are Alex's addiction of choice. Jackets, ties, vests. It's almost like a PMSing woman and chocolate.
As a compromise, we settled on corduroys and suit jackets for my two main men. That just left me. The rapidly expanding pregnant woman, who could not find maternity corduroys anywhere except online. And no time to order online.
Then I had a crazy idea. What if I just converted a regular pair of corduroys into maternity cords?!

I had almost everything I needed for the project. Wide elastic, an old A-line t-shirt that needed to be thrown out, pins, sewing machine... The only thing I needed was a pair of cords. Naturally we hit up the Goodwill (I love thrifting!).
Alex hit the jackpot and found a pair of lowrise reddish brown cords that fit me everywhere except the waistband. An added bonus was they were only $1, so if my idea turned out to be a dud, I wouldn't feel like crying as much. We brought them home and got to work.


The first thing I did was remove the waistband.


The next step was the t-shirt. I cut across the top of the shirt, right underneath the arms, to make a tube. Then pinned it along the outside of the pants.


They almost look like maternity pants!

(I took the belt loops off after this picture.)

At this point I threw them through the washer and dryer. When they finished, I measured out my elastic WITHOUT stretching it. I sewed the ends together to make a circle and then placed the elastic inside my new "waistband".


I pinned the elastic to shirt, then pulled the extra fabric around the elastic to make the casing. I trimmed a LOT of the shirt off as I worked my way around.


When it was all pinned down, I stitched around the bottom of the new waistband, right underneath the elastic.


They fit perfectly! I am ridiculously excited to wear these!

**I used a pair of lowrise pants, I don't think this technique would work with regular rise pants.

Monday, November 1, 2010

Let's talk about Spain

To start with, In honor of the World Cup champions 2010, we have nicknamed our in-utero blessing Spain.

Our family is full of excitment over our newest addition. Alex and my wonderful husband take turns singing and talking to Spain. Or poking Spain when the mood strikes. Now that we've reached the halfway point, Spain has been poking back.

As a self-proclaimed birth junkie, it surprises me that I haven't done much blogging during this pregnancy. It's not that I don't want to. Everytime I sit down to write, I can't find words that express my profound joy.
This pregnancy is amazing. Even while I spent hours draped over the toilet, I couldn't stop myself from reveling in it. I'm enjoying the journey. Every kick, every bladder bounce, every wave of nausea.
I almost wish I could slow the days down, because they're speeding by too fast. I don't know what's in store for our family. I don't know if we will have more biological children. So, I want to savor every moment of this pregnancy, now.

Monday, October 25, 2010

Breakfast of champions

I love pancakes! I love they are so versatile, you can alter them to fit whatever mood you're in! But alas! Even with a "Just add water" mix I have a knack for messing pancakes up. In fact, the unofficial rule in our house is that the first two pancakes must be thrown away.

While visiting my parents in August, my mom whipped the most incredible pancakes. Her's came out somewhere between traditional pancake and crepe. Even though I was still in the throes of morning sickness, I couldn't help but at least half a dozen everytime she made them.

Before we returned home, I made sure that I had a copy of the recipe safely tucked away in the memory card of my cell phone. Camera phones do have several advantages!

Two things make these pancakes so special. The first is that you use fluffed up egg whites. I was a little concerned that this step might be too time consuming, since we have a small window for breakfast between PT and formation in the mornings, but as long as you aren't whipping your egg whites by hand, you should be fine.
The second thing is yogurt. The style of yogurt you use directly affects the thickness and texture of the pancakes. My mom used a thinner yogurt and her pancakes came out thinner and almost sponge-like on the inside. I like my yogurt thick. The thicker the yogurt the taller fluffier the pancake.


Yogurt Pancakes
3 eggs, separated
1/4 cup sugar
2 cups yogurt
1/4 melted butter
1 1/2 cups flour
1 tsp soda
2 tsp baking powder
1 tsp salt

Beat egg whites. Mix beaten yolks, sugar, butter and yogurt. Add dry ingredients and mix well. Fold egg whites in the batter. Cook on a hot greased griddle.
When reverse bubbles begin appearing on the batter, it's time to flip the pancake.

These are fabulous with blueberries inside of them, or as we discovered this morning, with a homemade strawberry syrup.

Strawberry Syrup

1 cup water
1 cup sugar
1 1/2 cups frozen strawberries

Bring to a boil in a small sauce pan. Once the strawberries are thawed, mash with a vengence.
For a thicker syrup in a small bowl combine 1 heaping teaspoon cornstarch with 1 scant teaspoon cold water. Add to the boiling syrup and stir well.

Oh and for the record, I have never had to throw out the first two pancakes, since I converted to yogurt pancakes!

Thursday, October 21, 2010

I also need a small break from the kitchen.

In a progressive move of "Clearing out the freezers 2010", I pulled a roasting chicken out of the freezer and threw it in the crockpot before bed. It cooked all night on low, and then when I woke up I threw in some sweet potatoes, celery and an onion, and left it alone for a few hours.
When I pulled the bird out and deboned it. The small pieces went back into the crock for chicken soup and the main body of the bird was sectioned into 4 oz pieces to make some free-carb freezer meals for that cute husband I am so fond of.

There was a full crock of chicken soup, and since I am not eating meat, I wanted to do something with it. So Alex and I made a chicken pot pie. The very first completely from scratch pot pie I have ever made. I made a second smaller veggie pot pie for myself, and I have to admit it did put the freezer pot pies to shame.

I realized later, while I did remove a chicken from the freezer, I replaced it with single servings of:
Chicken Florentine
Chicken Marinara
Enchilada'd Chicken
Smothered Chicken

So I guess it's one step forward one step backward for "Clearing out the freezer 2010".

Thursday, October 14, 2010

Chair makeover

Today is one of those magical days where you suddenly feel accomplished.
Alex and I have been recovering our dining room chairs. A task I have attempted on multiple occasions, but never completely finished. Sitting on freshly covered and recushioned chairs is niiiice.


So the backstory. We were blessed with a dining room table set as a wedding gift. Upholstery + Children = Not the prettiest after a few years. So for my birthday I got a new table. Older and wiser, we agreed on NO UPHOLSTERY for our dining room chairs. Unfortunately we couldn't find chairs that went with our new table that didn't have upholstery. So we waited.

It may be pregnancy, or antsy-ness but I've been pushing out completed DIY projects for a few weeks now, and decided to make the best of it while I could.


We cut up a foam mattress topper to use as a extra layer of cushion, before replacing the fabric.
Then as an extra step of protection for the upholstery, we chopped up a vinyl taple cloth and covered the bottoms of the chair. I know the vinyl tablecloth won't last long, but I'm hopeful it will last long enough for us to get our new chairs.

Total cost: $19 to redo six chairs.
Canvas tablecloth $5 at a thriftstore
Vinyl tablecloth $3 at
Staples About $1 at
Mattress topper to use as cushion foam $10 at walmart

Thursday, October 7, 2010

Baba Yetu

It's amazing what a good playlist can help accomplish.

I've been Fall Cleaning the main living areas of our house in an attempt to not clean my bedroom.

I know.

In my defense, part of the floor in my bedroom has to be worked on. This will involve a lot of sanding, which means sawdust. Everywhere. It's scheduled for tomorrow morning, so hopefully I'll be able to being the de-sawdusting of my room sooner rather than later. My sinuses are already tingling in anticipation.

But back to playlists. When my brother got married, he passed out cds that he and his wife had personalized with songs that were full of meaning to them. One of the tracks was Baba Yetu, the opening song from Civilization IV. Now I've never played any of the Civilization games, so I had no idea where the song came from. Even before I discovered what the song was, it struck me as an amazingly powerful song.

I am completely awed that listening to a rendition of the Lord's Prayer in Swahili can still render me speechless.

Thursday, September 23, 2010

Score 1 for the Papaya

My favorite section in the grocery store, is without a doubt the produce section. Thankfully our household is full of avid produce eaters. Occasionally we still have produce turn a little faster than we can eat it.
Like the papaya. I have never aquired a taste for papaya. Every couple years I buy one to make sure I'm still not a fan, and so far my tastes haven't changed.
My husband picked up a papaya at the grocery store on Sunday, and it's been sitting on the counter taunting me. Everytime I walk into the kitchen I'm confronted by the huge oblong shape of a papaya just waiting to meet it's destiny.
Today I finally gathered my moxy, and chopped that tropical fruit into small pieces, I threw half of it into the blender with a couple pears, a banana, a peach and a handful of frozen strawberries. A little fake milk to help it blend and voila! I made a smoothie. A smoothie that I had every intention of feeding to small children so I didn't have to drink it.

Except my conscience started bothering me. Apparently I had to try some to get Jiminy Cricket of my back.

Would you believe it, I really enjoyed the smoothie!
I think I drank half it!

So apparently all I needed was a lot of other flavors to help mask the taste, and I'm good to go.

Who knew?

Friday, September 17, 2010

Household Hint

This is a entry from a old journal of mine dated September 18, 2008.


How to make your kitchen smell unappealing in creative ways.

You will need
-1 gallon size jar of bread and butter pickles
-1 large jar of salsa any brand and heat factor will do. DO NOT SUBSTITUTE hot sauce for salsa
-1 Jar of a delicious marinade
-1 Jar dill pickles any cut

All containers MUST be glass

You can throw each container on your floor and watch as the glass shatters, carefully sidestepping any broken pieces. Or you can take the shortcut [like I did] and simply place these item in the door shelving of your refrigerator. However you MUST have a loose railing.

Be careful as the ocean of pickle juices overtakes the kitchen floor as it will carry small pieces of glass, and if you have a tile kitchen floor it will making walking DANGEROUS!

This is guaranteed to make you kitchen smell funky and leave a sticky gritty feeling on your kitchen floor through at least 3 washes!


**Use at own risk. Author does not assume responsibility for any accidents that may occur. Side effects may include: dizziness, loss of blood, nausea, gagging, physical injury, mental injury and in extremely rare circumstances even death.

Monday, September 13, 2010

Gravid

For the past several weeks all my energy has been devoted to a project that was 2+ years in the making.
I've actually become slightly more obsessed, and find myself doing a lot of planning in my down time. My to-do list has expanded so far beyond what I expected, that I can't even write it all down to visualize the progress I'm making.

Rather than being discouraged, I find myself excited about piling more and more projects on my list. If I'm completely honest, I have to admit that I'm a little saddened that eventually it will be finished.

So, enough of that. Now is time for The Project in Three Photos!


It's been a while since this little piece of equipement was considered a staple. Tehnology has moved forward, but this little guy's track record leaves less room for inaccuracy.


Don't be fooled. These little creations are too cute for words and worth they're weight in gold. If you aren't careful you may need a 12-step program to break the addiction!!

And just in case there was any lingering doubt. This is my current reading list.


For the record. The top book is a GREAT resolurce for all mothers. Regardless of whether or not they have a preemie.

Tuesday, September 7, 2010

Basic Carseat Info

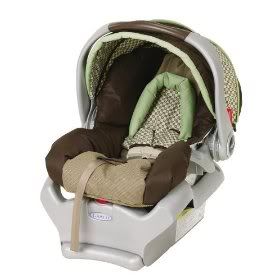
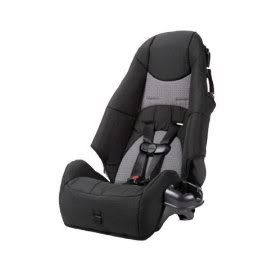
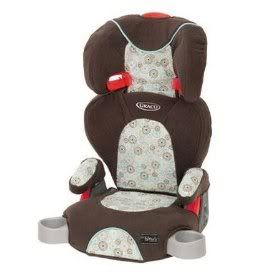
It's common knowledge is that there are 3 basic types of carseats; infant, forward facing, and booster. Some companies have taken pity on parents and designed convertable carseats that can be used for all 3 basic carseat types. *insert rejoicing here*

Unfortunately there seems to be some confusion over guidelines and regulations for the use of each car seat. Here is a very basic rundown on carseats.


Infant carseats (also known as "Baby buckets") are for rear facing use only. Children need to be kept rear facing for as long as possible. Rear facing is the SAFEST position for a child in the event of a collision. It protects their spinal cords, heads and necks.

"Very young children have immature vertebrae that are still partly made of cartilage. These are soft and will deform and/or separate under tension, leaving just the spinal cord as the last link between the head and the torso. The spinal cord can stretch up to 2 inches, but ruptures when stretched more than 1/4 inch. Real-world experience has shown that a young child's skull can be literally ripped from her spine by the force of a crash."
Paraphrased from carseat.org

The bare minimum for turning a child forward facing is one year AND 20 lbs. However the AAP recommends that you use your carseat rearfacing until your child meets the maximum weight set by the manufacturer.
Read more about the safety and protection extended rear facing offers at cpsafety.com and
car-safety.org

Forward Facing Carseats
Children who have been flipped forward facing in their carseats need to remain in a harness until they are about 4 years old and 40 pounds. If your carseat harnesses up to 65 pounds, go ahead and use it! A forward facing carseat has a harness. A booster seat does not. Look at your child objectively before you put them in a booster seat. Do they stay in their carseats without trying to escape? If you wouldn't put it past them, they're probably not ready for a booster seat.

Remember everytime your child "graduates" to the next carseat, their protection in a crash drops dramatically.

Booster seats
Booster seat come in two packages: Without backs or with backs. Booster seats with backs need to be used if the top of the child ears are higher the the back of the seat top or headrest. Booster seats CANNOT be used with just a lap belt.
Booster seats should not be used unless the child weighs at least 40 lbs and is 4 years old.cpsafety.org


Like food products, carseats have expiration dates. I believe most carseats are good for 6 years, though some of the newer convertible carseats have a life of 8 years. The expiration date should be stamped on the back of the carseat shell. Carseat safety standards are constantly being changed so a carseat that was "safe" when you were a child, probably isn't safe anymore.

All carseats have height limits in addition to the weight limits, a good rule of thumb is that whenever the child's head is 1 inch below the top of the carseat shell, it's time to replace your carseat.
The weight, height and installation requirements should be found either on the side of the carseat or in the user manual. If it doubt, call the company!

Never use a carseat if you don't know it's history. A carseat needs to be replaced if it's been in an accident or has expired.

Saturday September 25 is Nation seat check day. Get a free inspection!!